How to Document Your Go API
Table of Contents
Today, I’m writing a technical post about API documentation in Go. I hope you find it useful!
First, we’ll create a simple CRUD API using Go and the Gin framework. Let’s get started!
package main

import (
	"net/http"
	"strconv"

	"github.com/gin-gonic/gin"
)

type User struct {
	ID   int    `json:"id"`
	Name string `json:"name"`
}

var users = []User{
	{ID: 1, Name: "John"},
	{ID: 2, Name: "Doe"},
}

func main() {
	r := gin.Default()

	// Change to default is /api/v1
	api := r.RouterGroup.Group("/api/v1")
	{
		api.GET("/users", getUsers)

		api.GET("/users/:id", getUser)

		api.POST("/users", createUser)

		api.PUT("/users", editUser)

		api.DELETE("/users/:id", removeUser)
	}

	r.Run(":8080")
}

func getUsers(c *gin.Context) {
	c.JSON(http.StatusOK, users)
}

func getUser(c *gin.Context) {
	id, _ := strconv.Atoi(c.Param("id"))
	userFound, _ := findUserByID(users, id)
	c.JSON(http.StatusOK, userFound)
}

func createUser(c *gin.Context) {
	var user User
	c.BindJSON(&user)
	users = append(users, user)
	c.JSON(http.StatusCreated, user)
}

func editUser(c *gin.Context) {
	var user User
	c.BindJSON(&user)
	putUser(users, user)
	c.JSON(http.StatusOK, user)
}

func removeUser(c *gin.Context) {
	id, _ := strconv.Atoi(c.Param("id"))
	deleteUserByID(users, id)
	c.JSON(http.StatusOK, nil)
}

func findUserByID(users []User, id int) (*User, bool) {
	for _, user := range users {
		if user.ID == id {
			return &user, true
		}
	}
	return nil, false
}

func deleteUserByID(users []User, id int) []User {
	newUsers := []User{}
	for _, user := range users {
		if user.ID != id {
			newUsers = append(newUsers, user)
		}
	}
	return newUsers
}

func putUser(users []User, newUser User) []User {
	for i := range users {
		if users[i].ID == newUser.ID {
			// Update the existing user
			users[i] = newUser
			return users
		}
	}
	// Add new user if not found
	return append(users, newUser)
}
Now that we have a simple CRUD API in Go, let’s document it.
Note: In this example, I didn’t use the best approach for a CRUD. Instead, I defined a User struct to represent a user and used a slice to store the users. In a real-world project, you should use a database to store the data. Additionally, while I used basic functions to manipulate the data, it’s recommended to follow the repository pattern in production code.
With that out of the way, let’s move on to creating our documentation.
First, we’ll create a Makefile to simplify managing the app.
run:
    go run main.go

build-swagger:
	@go run github.com/swaggo/swag/cmd/swag@latest init -g main.go -o docs
Now, we need to install some dependencies to use Swag.
    go get -u github.com/swaggo/gin-swagger
    go get -u github.com/swaggo/files
Now, I need to add some descriptions using code comments in the main function.
// @BasePath /api/v1

// PingExample godoc
// @Summary ping example
// @Schemes
// @Description do ping
func main...
We need to add a route to serve the Swagger documentation.
r.GET("/swagger/*any", ginSwagger.WrapHandler(swaggerfiles.Handler))
Now, we need to run a command to generate the documentation.
make build-swagger
With all the Swag configurations complete, we can run the app and access the documentation in the browser.
make run
Now, access the URL http://localhost:8080/swagger/index.html to view the documentation.
Below is an example of how to document a CRUD:
GET USERS:
// @BasePath /
// ShowAccount 	 godoc
// @Summary      Show a Users list
// @Description  get users
// @Tags         getUsers
// @Accept       json
// @Produce      json
// @Router       /users  [get]
GET USER:
// @BasePath /
// ShowAccount 	 godoc
// @Summary      Show a Users list
// @Description  get users
// @Tags         getUsers
// @Accept       json
// @Produce      json
// @Param        id         path      string  true  "ID"
// @Router       /users/{id}  [get]
POST:
// @BasePath /
// ShowAccount 	 godoc
// @Summary      Create a User
// @Description  create users
// @Tags         createUser
// @Accept       json
// @Produce      json
// @Param user body User true "User to create"
// @Router 		/users [post]
PUT:
// @BasePath /
// ShowAccount 	 godoc
// @Summary      Edit a User
// @Description  edit users
// @Tags         editUser
// @Accept       json
// @Produce      json
// @Param user body User true "User to edit"
// @Router 		/users [put]
DELETE:
// @BasePath /
// ShowAccount 	 godoc
// @Summary      Remove a Users list
// @Description  delete user
// @Tags         removeUser
// @Accept       json
// @Produce      json
// @Param        id         path      string  true  "ID"
// @Router       /users/{id}  [delete]
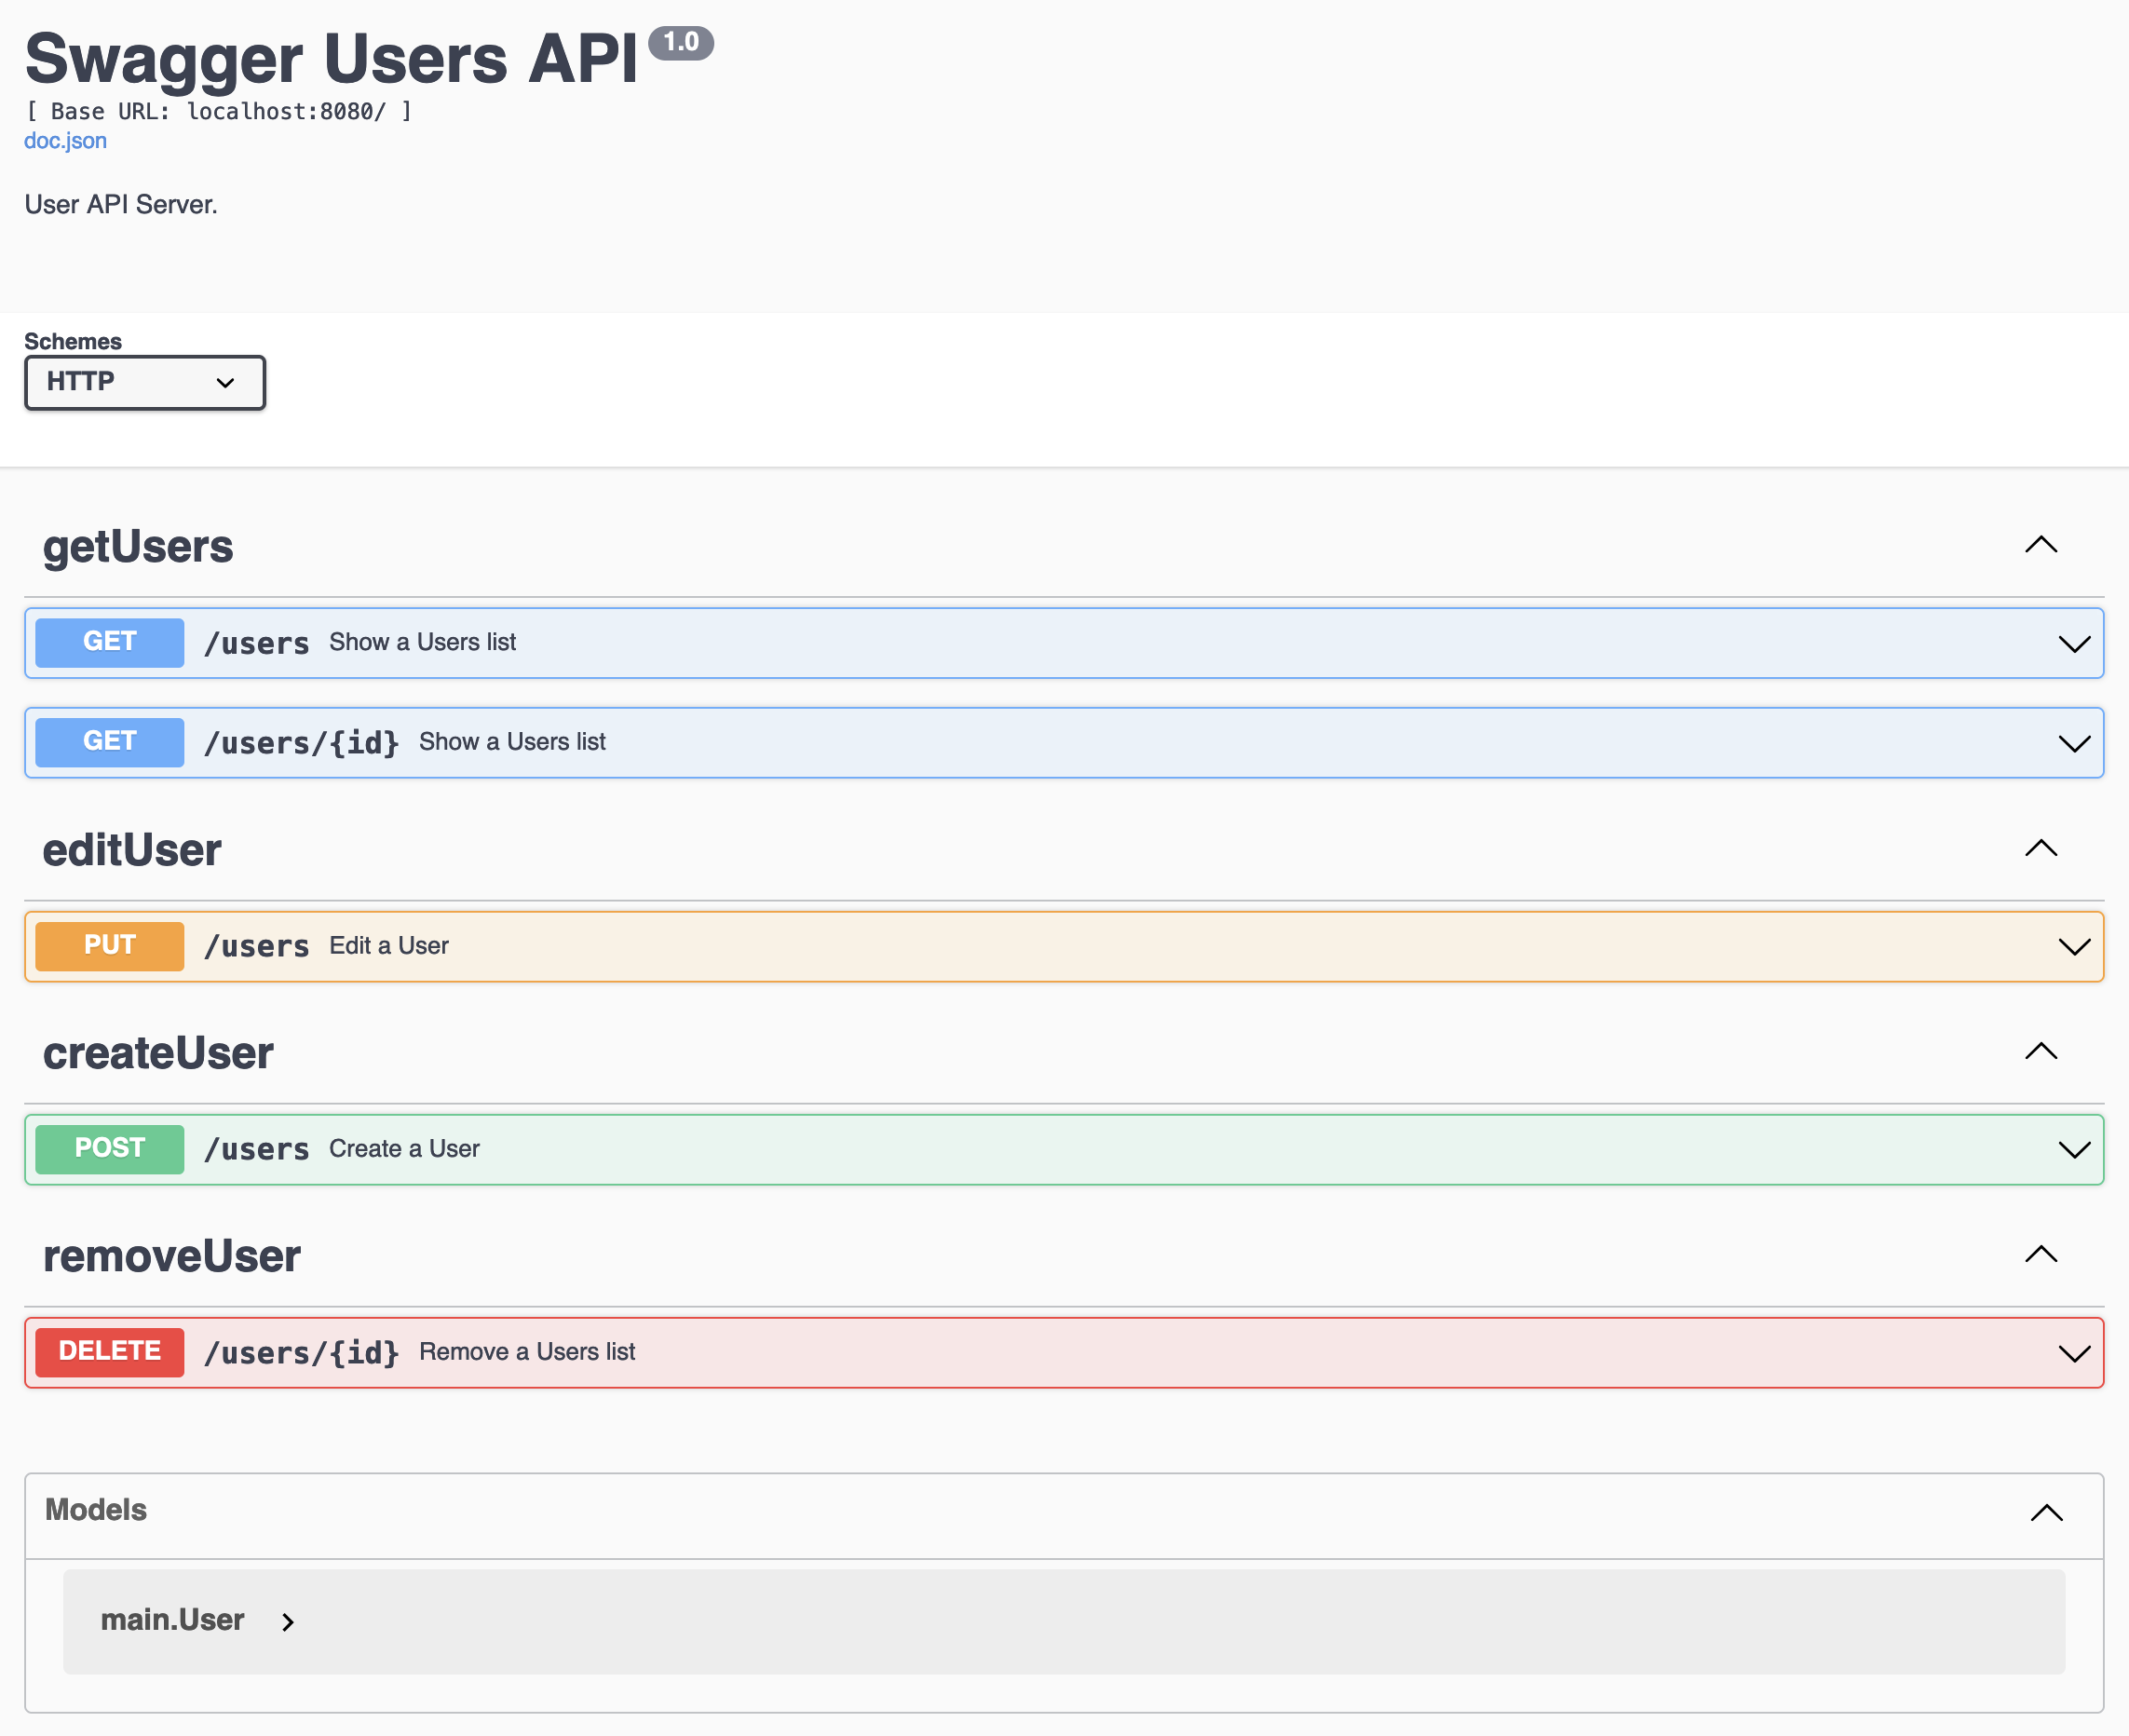
With these comments in each function, we can generate the documentation using Swag.
The result is:

You can view the project in the repository.
Conclusion
In this article, we learned how to document a Go API using Swag. We started by creating a simple CRUD API in Go and then documented it using Swag. We also learned how to generate the documentation and view it in the browser.
Swag is a powerful tool that can help you document your Go APIs easily.
I hope you found this article helpful. If you have any questions or suggestions, feel free to send me a message in my social media accounts.
Thank you for reading!